ARTMMA Initial Hardware and Software Test
- Oct 17, 2025
- 2 min read
Objective: Connect the DHT22 with the temperature sensor on a breadboard and connect it to the computer to make sure everything is working properly.
Hardware
I went through all of the new hardware that I recently received (thank you, Mr. Lary) and ended up choosing the Uno R3 as the development board for the project. There were 3 full development kits included in the package, so it was an easy choice.
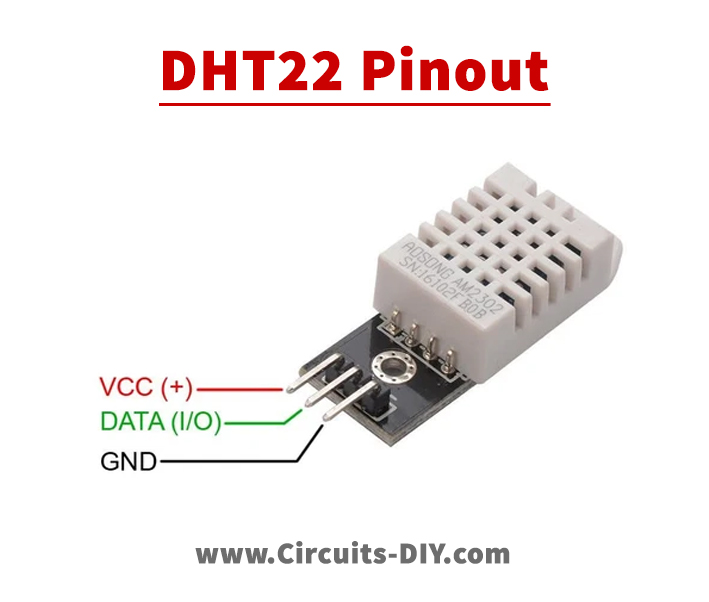
Also included in the box were 3 DHT11 sensors. As discussed in this previous blog post, the margin for error on the DHT11 was too high for the scope of this project, so I purchased 3 DHT22 sensors anyway.


I followed an Instructables guide on how to connect the Arduino to the DHT22. The DHT22 only has 3 pins, so the installation could not have been easier.
Software

I downloaded the Arduino IDE from Arduino's website. The code included in the Instructables guide didn't mention all of the required libraries, but finding the correct one was easy with the Sketch -> Include Library -> Manage Libraries feature in the IDE. DHT kxn by Adafruit library was the one I was looking for.
Code
Below is the code to read and output the temperature and humidity data. To run, simply click Verify -> Upload.
//Libraries
#include <DHT.h>
#include <DHT_U.h>
#include <Adafruit_Sensor.h>

//Constants
#define DHTPIN 2     // what pin we're connected to
#define DHTTYPE DHT22   // DHT 22
DHT dht(DHTPIN, DHTTYPE); // Initialize DHT sensor for normal 16mhz Arduino


//Variables
int chk;
float hum;  //Stores humidity value
float temp; //Stores temperature value

void setup()
{
  	Serial.begin(9600);
	dht.begin();
}

void loop()
{
    //Read data and store it to variables hum and temp
    hum = dht.readHumidity();
    temp= dht.readTemperature();

    //Print temp and humidity values to serial monitor
    Serial.print("Humidity: ");
    Serial.print(hum);
    Serial.print(" %, Temp: ");
    Serial.print(temp);
    Serial.println(" Celsius");
    delay(2000); //Delay 2 sec.
}

The sensor was connected directly to my computer next to an open window. This will not be the final location. The output of the data can be viewed in the Serial Monitor.
Everything is working perfectly! I may calculate and display the temperature data in Fahrenheit in the future.
I've had the sensor collecting data for at least an hour now, and have watched the temperature go from 20.3°C to 17.0°C as the sun sets. Very cool!
Note: Keep the baud at 9600. I was fiddling with the IDE and changed the baud to get illegible results (below). For a moment there, I didn't remember what the initial value was, so I'm making a note of it here!

Outcome: The DHT22s were connected to the Uno R3 boards and were able to output temperature and humidity data successfully.
Next steps:
Verify that all 3 boards work correctly and produce similar data when running the code (must test all 3 in immediate succession to verify temperature and humidity levels are the same)
Add batteries to the boards so that they can run independently in their designated locations
Connect all 3 boards to the Wifi and have my PC collect data over time
Set up the Unity environment
Connect the data stream to the Unity environment


