ARTMMA: Testing Boards & Configuring a Unity Scene
- Nov 4, 2025
- 2 min read
Objective:
Test all 3 boards to ensure proper functionality
Tweak Arduino code
Update Unity and start configuring the environment
Immediate troubleshooting when testing all 3 boards in the Arduino IDE
For some reason, 2 of my 3 boards throw the following error when plugged in.


For some reason, the Arduino IDE was swapping the ports when switching between boards, even though the port remained the same. The quick fix is to move the USB connection to the other port on the front of my PC.
Tweaking the Arduino code
Now that I know all 3 boards work and output similar readings, I need to edit the code a bit to display Fahrenheit (🦅) and truncate the digits after the decimal point. The DHT22 reads to 0.1, not 0.01. This was a quick fix (highlighted below). I also removed the humidity output.

void loop(){
	temp = (dht.readTemperature() * 1.8) + 32;

    Serial.print("Temp: ");
    Serial.print(temp, 1);  //truncates the temp
    Serial.println(" Fahrenheit");
    delay(2000); //Delay 2 sec.
}
Configuring the Unity Environment
After updating my version of Unity, I found a handy project template that should be exactly what I need. It contains XR packages and core components for interactions and UI.

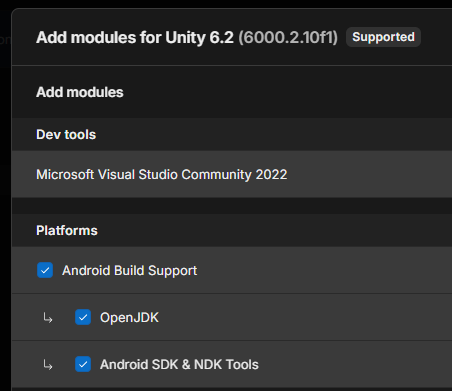
I need to install extra modules for Android build support in the Unity Hub. Because I have an Android device, the Android SDK is critical for compatibility with my phone.
I clicked around the sample scene, checking out the prefabs and quick demo. Thankfully, I have used Unity before to develop AR scenes for the Microsoft HoloLens 2, so the learning curve should not be too high to develop a mobile AR scene.

Outcome: I completed all 3 objectives: testing all sensors, tweaking Arduino code, and configuring a Unity environment for mobile AR use.
Next steps:
Review the quick start guide for the Unity AR Mobile Template
Connect the output of one of the sensors to Unity


